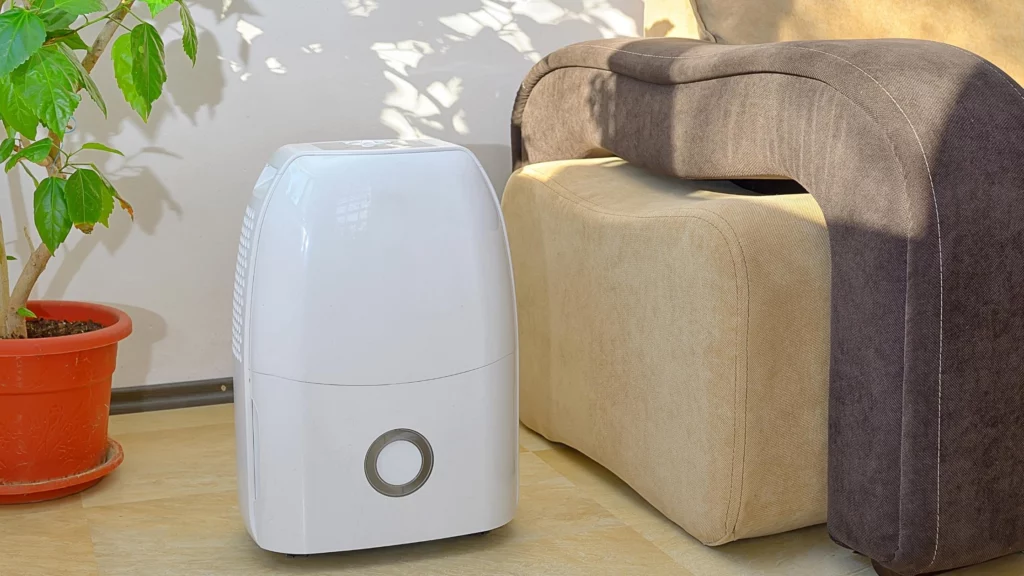
Midea dehumidifier reviews
3 Key Takeaways:
🚀 Midea dehumidifiers offer consistently good performance and have received 5-star ratings from customers.
🚀 They incorporate advanced technological improvements like Wi-Fi access, voice, and smart control.
🚀 Midea dehumidifiers have a sturdy and innovative extendable design, making them portable and easy to store without interfering with performance.
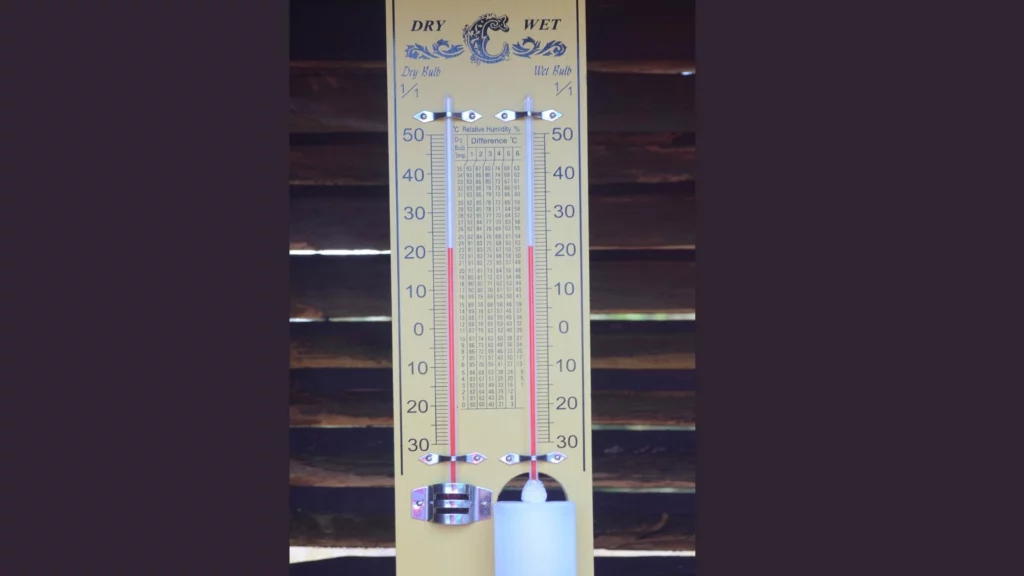
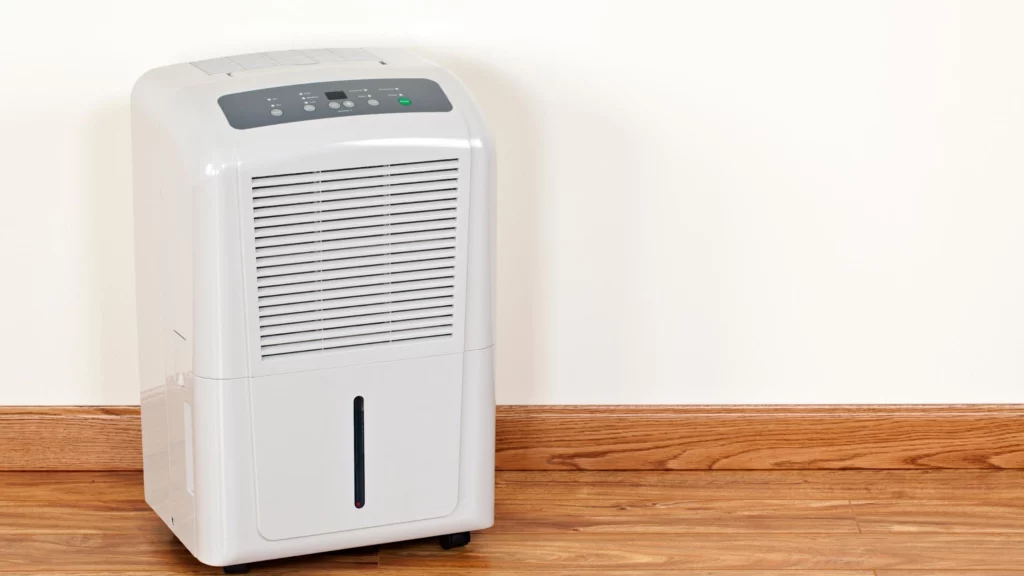
When it comes to achieving the ideal relative humidity level in the air there are several factors that come into play. The most trusted devices that make humidity level maintenance and moisture extraction possible are dehumidifiers. In this article, we will discuss the best reviews of the Midea dehumidifier models, both the traditional models and the extendable dehumidifier models. We trust you will be able to take into account the pros and cons of each dehumidifier design and identify the perfect unit that will meet your needs.
The pros and cons of using Midea dehumidifiers in the home

- Midea dehumidifiers offer consistently good performance and have bagged 5 stars from customers.
- They are being built to incorporate advanced technological improvements like Wi-Fi access, voice, smart control, etc.
- Their body is sturdy and innovative in the extendable dehumidifier design. This makes portability and storage easy without interfering with the performance of the dehumidifier.
- Affordable price for the impressive features and performance.
- Multiple draining options for the water collected in the tank; via drain hose for continuous drainage and manual draining. Some models come with the drain hose included on purchase.
1. Midea Cube 20-Pint Smart Wi-Fi Dehumidifier (MAD20S1QWT) Review
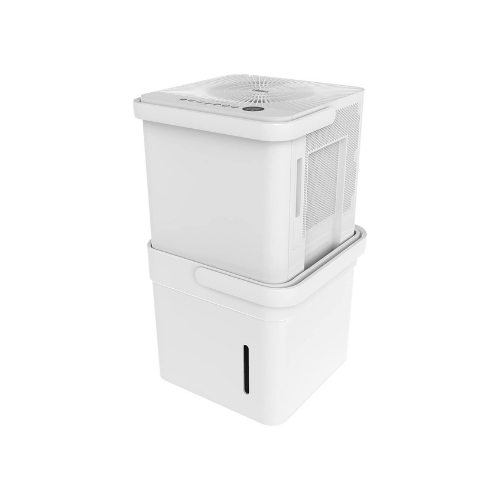
Drawing out excess moisture from the air and maintaining the desired humidity level of any room can be achieved with ease using the Midea Cube 20-pint dehumidifier. This dehumidifier is designed to extract moisture from any damp basement, large rooms, damp rooms filled with mold and mildew, and other areas battling high humidity levels.
The Midea Cube 20-pint unit comes with a 3x larger water tank capacity. This large water bucket is perfect to store the collected water that has been extracted from the air in a large room. Since the unit can cover an area of 1,500 square feet effortlessly, the collected water from this area is also large. Due to the large water bucket, you can get a longer time of dehumidification with this unit. This hassle-free use of the bucket makes the unit a convenient choice.
The best advantage of the Midea Cube 20-pint unit is the no-bucket option. All you have to do is set the unit to the preferred settings. The bucket can be removed and simply placed over a sink and connect the unit to the drain hose included or position the unit over the floor drain (near a window or door).
The product dimensions design is perfect and compact for storage. The Media Cube dehumidifier has a special nested design that makes it easy to maintain the desired humidity level of any room. It can be easily extended to function with the full tank capacity.
An added benefit of investing in this unit to carry out dehumidification for your home is that this unit makes it easy to monitor the water level and humidity level from anywhere. The Midea Cube Air App makes it possible to connect the unit with the available Wi-Fi access and voice assistance making it one of the best smart dehumidifier units on the market. This provides smart control and voice control to have real-time monitoring of the water level and humidity level.
Being cautious of energy usage while running any electrical unit is important. This Midea Cube 20-pint unit is an excellent dehumidifier that comes with an Energy Star rating. The Energy Star certification of this unit ensures the unit carries out energy-efficient operations to keep the energy bills low and also prevent waste of energy usage.
The multi-directional air intake and the adjustable fan speeds make it possible to have the essential dehumidification. This good dehumidifier can work to keep living spaces free from excess moisture either using a low fan speed or high fan speed as required. The smart control, accessibility to connect to iOs devices, Google Assistant, user-friendly control, power button, Auto defrost, easy-to-wash bucket, and the perfect size to fit into both a finished basement and any size room, are the other features that make this unit a great dehumidifier to maintain the ideal humidity levels in living spaces of all kinds.
Are you in need of a smart dehumidifier for your house to transform a humid environment into a moisture-free one? Spend time analyzing the latest reviews available on Midea customer service and this Midea Cube unit versus traditional dehumidifiers to identify which unit your house will benefit from. If this unit is exactly what your basement or home can use during high humidity levels, hot days, and summer months; visit Amazon.com right now to purchase this great dehumidifier at an exciting price.
Pros and Cons of the Midea Cube 20 Pint Dehumidifier

- Best portable dehumidifier available in the market with an extendable water tank.
- Large water tank capacity that can stretch to 3x.
- Sturdy unit that can cover an area of up to 1,500 square feet making it perfect for large rooms and any large damp basement or finished basement.
- The drain hose included makes it easy to empty the water tank over a sink for continuous draining.
- The included hose is available during purchase.
- Wi-Fi access that can connect to a home internet account makes this the best smart dehumidifier on the market.
- The 3 settings on fan speed help one to choose the necessary level of dehumidifier that the humid air the house can use.
- The unit also guarantees ultra-quiet operation.
- Allows functioning with voice control and smart control for continuous monitoring of the desired humidity level in the air and water level in the bucket.
- The compact design of this smart dehumidifier makes it a better and more functional design in comparison to traditional dehumidifiers.
- Energy-efficient operation of this portable dehumidifier is possible with Energy Star certification. Due to the Energy Star, this excellent dehumidifier makes it easier to save on energy usage and energy bills
- A cost-effective unit to be purchased.
2. Midea Cube 50 pint Dehumidifier Review

Next on the list, we have a 50 pint dehumidifier with a pump- the Midea Cube 50 pint dehumidifier is a large capacity unit. It has been designed to cover an area of 4,500 square feet area. It is not just an ideal choice to keep large rooms free from excess moisture, but it can also cover a larger space like an entire house.
Protect the air in your house from being loaded with excess moisture and maintain the desired humidity level effortlessly with this large Midea Cube 50 pint dehumidifier. The 3x larger water tank capacity is not just more than adequate to contain the collected water while carrying out an effective control over the high humidity levels, but it is also the simplest to clean and empty.

The built-in pump of this unit makes it easy and hassle-free to remove the collected water from the bucket and the unit. You can drain the unit and the in-built pump either horizontally or vertically using the drain hose into the sink or floor drain.
An advanced feature of this smart dehumidifier is the efficient smart control technology that can connect the unit to a Wi-Fi account. By connecting to a Wi-Fi account you can have control over the humidity levels, and moisture content, and monitor the water bucket from anywhere in the room. When the bucket fill level is reached, with Wi-Fi control you can receive a notification on your phone.
The humidity levels maintenance capacity of this Midea Cube 50 pint dehumidifier is perfect for large rooms or basements. Auto restart and Auto defrost are functions that make maintaining this 50 pint dehumidifier easy in both summer months and colder months. The power button and control panel are simple and easy to use in this smart dehumidifier.
Dehumidification with an Energy Star ensures that the energy usage is always lesser than expected. This Midea 50 pint dehumidifier comes with a great review and 5 stars owing to its advanced features, portability, Wi-Fi account accessibility inclusive of voice control, Energy Star certification, and affordable price.
Do you think this portable dehumidifier will be the best pick for your house to maintain the ideal humidity levels and extract the high moisture content from the air? If yes, do a thorough study of the latest reviews on this Midea Cube 50 pint dehumidifier and hurry to Amazon.com to purchase this model at the best price offer.
Pros and Cons of Midea Cube 50 pint Dehumidifier with Pump
- A perfect model of the dehumidifier with a pump to maintain the desired humidity level in the air
- Energy Star dehumidifier that ensures minimal energy usage during operation.
- The smart control feature in this smart dehumidifier with a pump enables connecting the dehumidifier to a Wi-Fi account to monitor and use voice to control the humidity levels from anywhere in the room.
- Easy monitoring of the bucket fill level using the Wi-Fi even on iOS devices can be done with ease.
- The built-in pump and large water tank capacity make this dehumidifier a convenient choice for large rooms.
- The drain hose included on purchase makes emptying the bucket or built-in pump into the sink or floor drain effortless.
- The adjustable fan speed settings like other traditional dehumidifiers make this 50 pint dehumidifier a perfect choice to dehumidify a large space as required.
- Simple to maintain washable filter and ultra quiet operation.
- Customers trust this 50 pint dehumidifier to maintain the air in damp rooms with a balanced relative humidity level and therefore it comes with 5 stars and an impressive review.
- Exciting offers on the price available on Amazon.com
3. Midea MAD20C1ZWS Dehumidifier Review
The Midea 22 Pint Dehumidifier is the next product on the list. This portable dehumidifier is of the right size and capacity to work effectively when it comes to moisture extraction from the air and maintenance of the relative humidity levels. This dehumidifier can cover an area of up to 1,500 square feet, thereby making it a great pick for any small or large room, kitchen, laundry room, basement, crawlspace, etc.
The Energy Star certification of this 22-pint dehumidifier makes it possible to run and operate this dehumidifier with minimal energy usage. You can also be assured of ultra-quiet operation from this dehumidifier with its low dBA output. This simple portable dehumidifier can carry on with moisture removal from the air from any room or basement, by being quieter than a refrigerator.
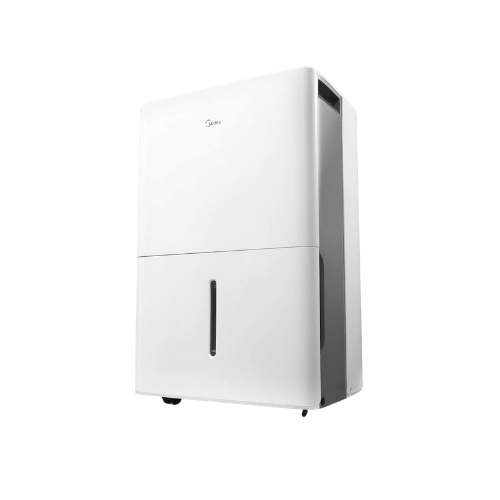
Apart from the sleek design that is compact for any small room or space, sturdy body, 360° rotatable wheels for portability, adjustable fan speed settings, etc., this dehumidifier comes with smart features that make it convenient and hassle-free to use.
The Auto restart function makes it possible to restart the dehumidifier with the originally saved settings after a power outage. You can also make use of the ‘Turbo’ mode to increase the moisture extraction process when the humidity level in the air is higher than usual. The Auto defrost mode on the dehumidifier keeps a watchful eye on the water in the bucket and coils from being frozen. You can also run the dehumidifier on a 24-hour cycle if required, without worrying about spills and overflows.
Emptying the bucket is simple. The 0.8-gallon bucket collects the water extracted from the air. You can connect any standard drain hose that suits the model to carry out gravity draining or you can also do manual draining of the bucket. The easily removable and washable air filters will help you to maintain healthy air quality. The dehumidifier allows its user to set a reminder when the reusable air filter needs cleaning.
Does this review on the 22 pint Energy Star Midea Dehumidifier convince you that it has all the features you expect from a dehumidifier to maintain the ideal humidity level of a room? If yes, visit Amazon.com right away to bring home this dehumidifier with the best price offer.
Pros and Cons of Midea MAD20C1ZWS Dehumidifier
- One of the best dehumidifiers to maintain the ideal relative humidity level at an affordable price.
- A simple and user-friendly portable dehumidifier with wheels and handles.
- The 0.8-gallon bucket is sufficient to hold the extracted water from the air.
- Emptying the water tank over a sink using gravity or continuous draining with a drain hose is possible.
- Energy Star certified design for energy-efficient operation.
- Minimal energy usage guarantees lower utility bills.
- Adjustable fan speeds allow dehumidification to suit the space. Low and Turbo mode on fan speed is available.
- One of the highly efficient models in traditional dehumidifiers for humidity maintenance in any damp room, basement, laundry room, etc., for an area of up to 1,500 square feet.
- Ultra quiet makes it perfect for home and office use.
- A reminder can be set when the entire fill level of the bucket is reached.
- User-friendly LED display, power button, and control panel.
- Trusted design among customers with consistent 5 stars and a good review.
- The manufacturer provides 1-year parts and labor warranty on the purchase of this dehumidifier.
4. Midea 4500 Sq Ft MAD50C1ZWS Dehumidifier
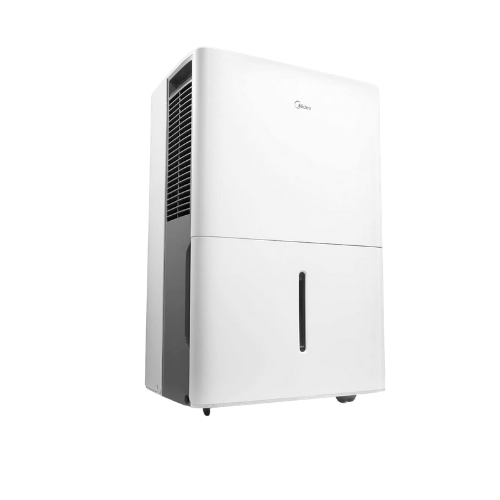
The final Midea dehumidifier on the list is another large capacity model. If you are in need of dehumidification to cover any large area of up to 4,500 square feet you can invest in the Midea 50 Pint Energy Star Dehumidifier. Customers claim that the features built into this dehumidifier are highly efficient and deliver seamless performance when it comes to keeping the air free from high levels of moisture.
Being an Energy Star dehumidifier, you can rest assured that your utility bills are safe from spiking high. Keep any large room, basement, kitchen, crawlspace, living room, etc., protected from the damages a high humidity level can cause. The 1.6-gallon water tank is built to sufficiently hold the water extracted from the air. Emptying the bucket can be done with ease using a drain hose, over a sink using the gravity drain method, or even manually into a sink.
Balancing the humidity in the room using this Midea dehumidifier can be done to perfection with adjustable fan speed settings. You can either turn on the Low mode or the Turbo mode to meet your requirements. Another added advantage of using this portable dehumidifier is its ultra-quiet operation, which is expected to be quieter than a refrigerator. This makes it a perfect choice for bedrooms and workspace areas.
The removable, washable, and reusable air filter ensures that the quality of the air that passes in and out of the dehumidifier can be maintained at all times. Setting a reminder clean the air filter can also be done to make it easier. Bucket fill level alert, Auto restart, Auto defrost, user-friendly LED display, power button, study and sleek body, portable wheels and handle, etc., are a few of the many features that contribute to the excellent review and 5 stars that customers rate this dehumidifier with.
Does this dehumidifier seem like the perfect fit for your home? Visit Amazon.com right away to purchase this dehumidifier at the best price!
Pros and Cons of Midea 50 Pint Energy Star Dehumidifier
- One of the best dehumidifier units available in the market to maintain the desired level of humidity in the air.
- A large capacity water tank and performance make it suitable for any large basement or large room. The dehumidifier is equipped to cover an area of up to 4,500 square feet area, extracting up to 50 pints of moisture from the air.
- Emptying the 1.6-gallon water bucket is effortless, either by using the drain hose over a sink or manually as well.
- The dehumidifier comes with adjustable fan speed settings that can be selected to suit the existing humidity in the air.
- 360° rotatable wheels and easily movable handles make it an excellent choice for a large portable dehumidifier.
- Ultra quiet makes it a convenient choice for workspace and bedrooms.
- Auto defrost, Auto restart, and tank fill level alert, help in the hassle-free operation of the dehumidifier.
- A washable and reusable air filter aids in ensuring that the air that circulates back into the room is clean and free from allergens.
- The customer avails of a 1-year warranty on parts and labor on the purchase of this dehumidifier.
- Cost-effective choice for a high-performing dehumidifier.
- 5 stars and an impressive review list from customers.
A guide to installing and using the Midea Cube

Installing and using Midea Cube dehumidifiers is quite similar to the other models. You have to have a professional investigate the area to understand the quality of air, the existing humidity in the air, and the damage that has already taken place. If the room or any place in the home has signs of moisture damage, they must be dealt with first. You must also make a careful and conscious decision to invest in the right size and type of dehumidifier to suit your requirement. The price of certain models might shoot overboard your budget, but check if the price is a worthy investment in the long run.
Calculate the size of the room, the source of moisture, the capacity of the tank, and the dehumidifier itself. Each of the needs of the home must be met by the dehumidifier effortlessly. If the dehumidifier is for the basement, there are special models available to meet the humidity and weather conditions present there, or if the dehumidifier is for your bedroom you can make quiet working your priority.
- Select the place where the dehumidifier will be placed, ideally in close proximity to the source of moisture or in a position where the dehumidifier can cover the entire room.
- Connect the cables and drain hose. Based on the type of drain, continuous, gravity, or manual draining, ensure the drain hose is connected to the outlet source.
- Enter the desired humidity settings in the dehumidifier.
- Connect the dehumidifier to the Wi-Fi account to activate voice control settings.
- Turn On the dehumidifier and let it run for a few hours continually to start extracting moisture from the air.
FAQ Section
1. How to clean the filter on a Midea dehumidifier?
Cleaning the air filter in a Midea dehumidifier is simple. Depending on the type of model you own, access the air filter and remove them carefully. If the dehumidifier has 2 air filters, remove them both and give a quick rinse under running water.
You can use an old toothbrush or a soft bristles paint brush to dust off any dust accumulation in the air filter. Mildly warm soapy water is the best choice to do gentle scrubbing. You can rinse again with warm water when you finish scrubbing. Air dry the air filter or use a vacuum to dry it. You can make use of this time to also wipe down the interior and exterior body of the dehumidifier using a damp washcloth. Do not forget to dry the dehumidifier thoroughly before you turn On the power supply.
2. Do you know how to set the timer on a Midea dehumidifier?
Setting the timer on the Midea dehumidifier can be done by referring to the user’s manual. The manual will contain clear instructions on how to set any timer on the dehumidifier.
You will simply have to press and hold the key buttons to change the Timer by 0.5-hour increments. First up to 10 hours and then up to 24 hours by 1-hour increment. This might vary across each model. Consult with the technical support team to get it right.
3. What is the noise level of Midea dehumidifiers?
Almost all Midea dehumidifiers are designed to deliver silent operation. They aim to keep their noise level under 51 decibels.
4. What are the best places to buy Midea dehumidifiers?
There are many best stores available on the online and offline market that promote interesting offers and discounts on the cost and warranty. Amazon.com is one of the most trusted online stores that sell Midea dehumidifiers for the best price
5. Which Midea models are being recalled?
The following are the Midea dehumidifier models that are being recalled.
- MDC-25AEN3
- MDC-45AE
- MDC-65AE
- MDF1-30AE
- MDF1-40AE
- MDF-30AE
- MDF-40AE
- MDF-50AE
- MDF-65AE
- MDL1-40AEN3
- MDS-25AE-BA3
Wrapping Up
That’s a wrap on the article. We trust you the article was able to convey the functionalities of the different features in each review. Share with us your experiences while using Midea dehumidifiers and which model met your requirements the best.

About The Author
Olivia — a self-confessed air quality addict — is a home climate enthusiast, fresh air advocate, and someone with deep personal experience and knowledge about mold extermination. Her work was mentioned in countless notable humidity publications. Previously she was an editor at Mold Remediation.